Garrattfan's Modelrailroading Pages

NBDS 118-119
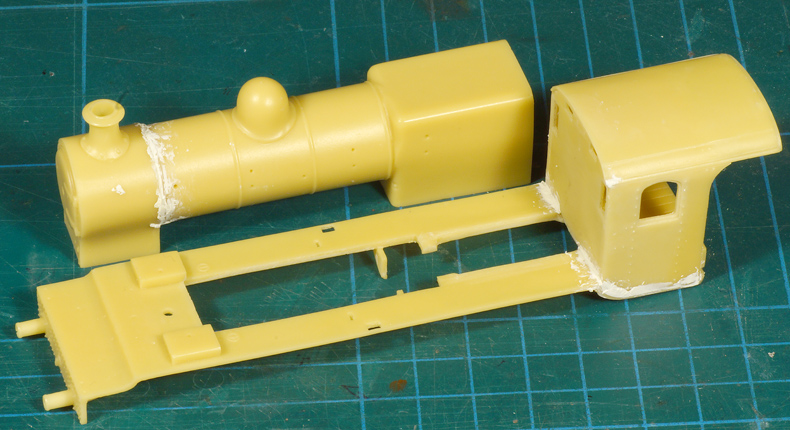
Superstructure of the loco

| Using the running board for fitting on the frame is not very practical as it flexes very much and it is also very vulnerable. So in order to make the running board suitable as a reference for building up the frame it is wise to build the main structure of the superstructure in parallel. | |
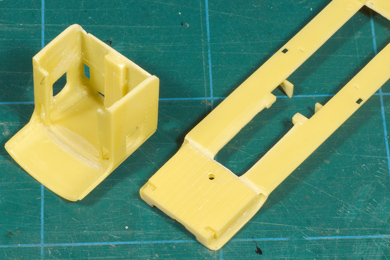 |
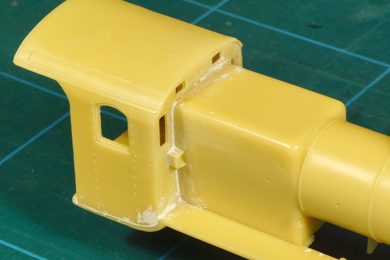
Assembly of the superstructure starts with creating a good fit between the running board and the driver's cab. Take note that the sides of the driver's cab may not be parallel. Anyway in my case they were not. The right side was okay, the left clearly bent inwards by a mil or so. I made the resin soft in boiling water and carefully bent the left side out by that millimeter. Warning: the boiling water makes the whole cab soft. So be gentle, before you know something else is bent too. So make sure you only ease out the particular offending part! |
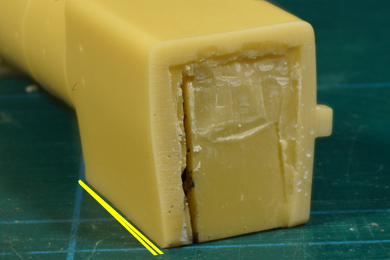
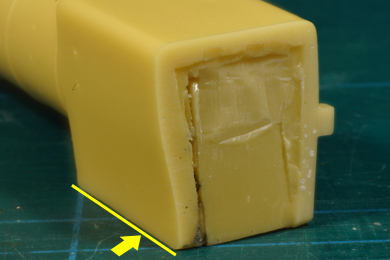
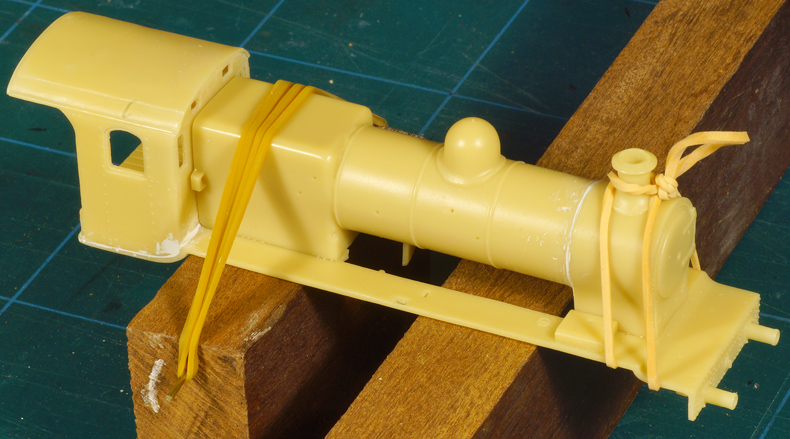
Look, fill and sand. Resin is not a very accurate material. Generally there are lots of gaps and crevices to be filled. Although there were relatively few air bubbles, a testimony to the good casting work of the supplier, there i sa very obtrusive gap between the first boiler band and the rear of the smokebox. Also fitting the cab on the running board did not produce a perfect fit. In both cases I filled them with Milliput and later sanded them down. |
|
 |
 |
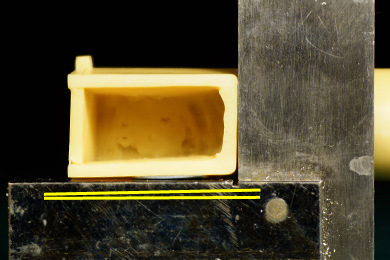
| As mentioned with the driver's cab resin casting is not particularly accurate. The left side of the firebox was clearly off by a mil or so | |
 |
 |
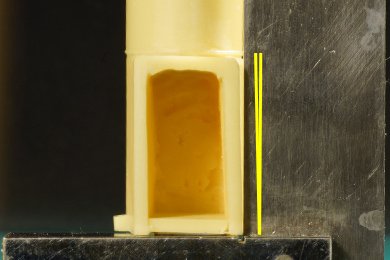
| I sawed a slit over the height of the backside of the firebox. Then, having held it in boiling water for a few seconds I pushed the left inwards and closed the newly sawn gap. Perfection! Take care though not to bend the rest of the firebox side out of form. | |
A bit of sanding on a flat sheet of sanding paper achieved a perfect flat fit. Then the boiler was mated to the running board |
|
 |
Again remaining gaps are filled with Milliput and sanded down.
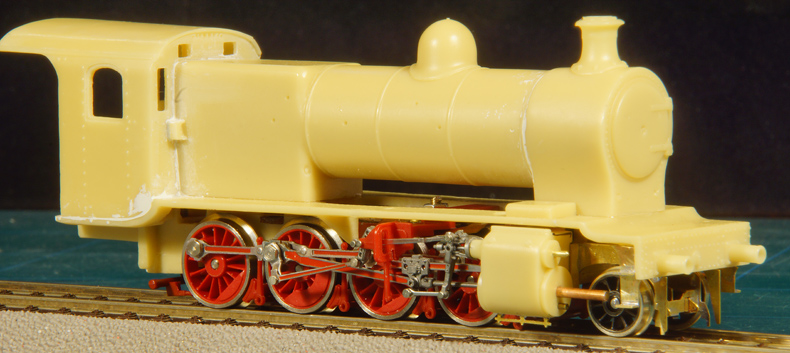
The superstructure has now reached the stage where it is stiff enough to be used as a reference for the work at the frame. Now you can continue the build-up of the frame |
Once the frame has almost been completed it can be trial assembled to see if everything goes together well. |
|
 |
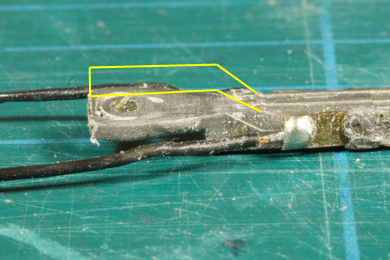 |
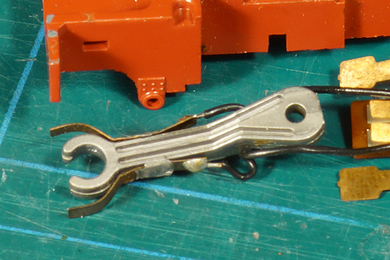
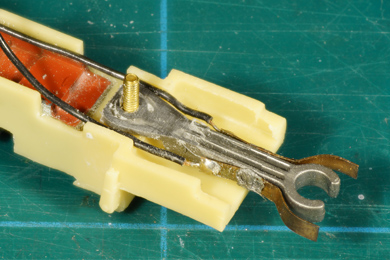
| One of the last jobs before detailing is adding the coupler to the tender. The original part has a kind of joggle in it which will not fit under the floor of the new cab. So I milled it down to 1.5 mm | |
 |
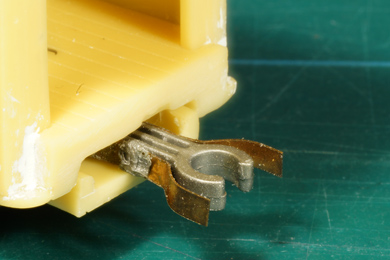 |
| It is held in place by the very same bolt that holds the frame and the superstructure together. Once frame and superstructure are joined it sits firmly in place and moves freely. | |
 |
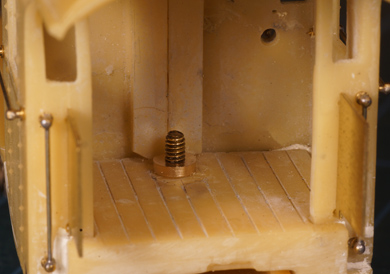
Originally I intended to glue a nut inside the cab where the afore mentioned bolt needed to fit in. But after assembling and disassembling the loco a few times the nut came loose. As it would eventually fit under the boiler backhead where it would never be accessible again I deemed glueing to be an unreliable construction. So I turned to the lathe and made myself a collared bush with an inside M2.0 thread. The bush itself is 3 mm in diameter and the collar is 4 mm. I enlarged the hole in the cab floor a little and glued the bush in place. |
 |
|
|
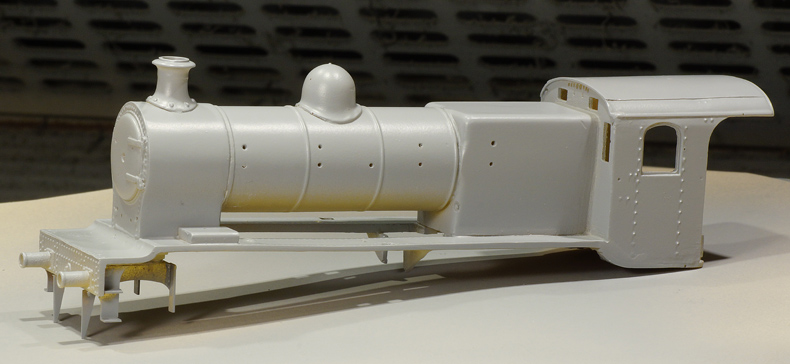
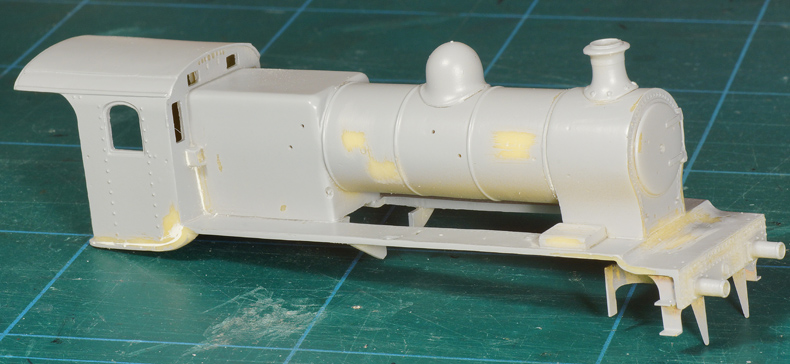
In these few steps the superstructure has been completed. Before detailing can begin it is necessary to check if all seams have been filled and filed well enough. The best way to survey that is spray the model with primer. There is nothing more betraying then a good coat of grey primer. It literally reveals every mistake you made and everything you forgot. I have to remove this coat again and that is done with thinner so I first need to establish if the resin is sensitive to thinner. So I dunked a small part in thinner for an hour and concluded it had no negative impact. |
 |
|
The number of disturbed spots shows how much rework there still was. It proved to be a good idea to do this. |
|


Sign my
GuestBook